
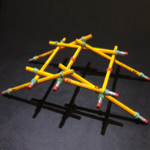
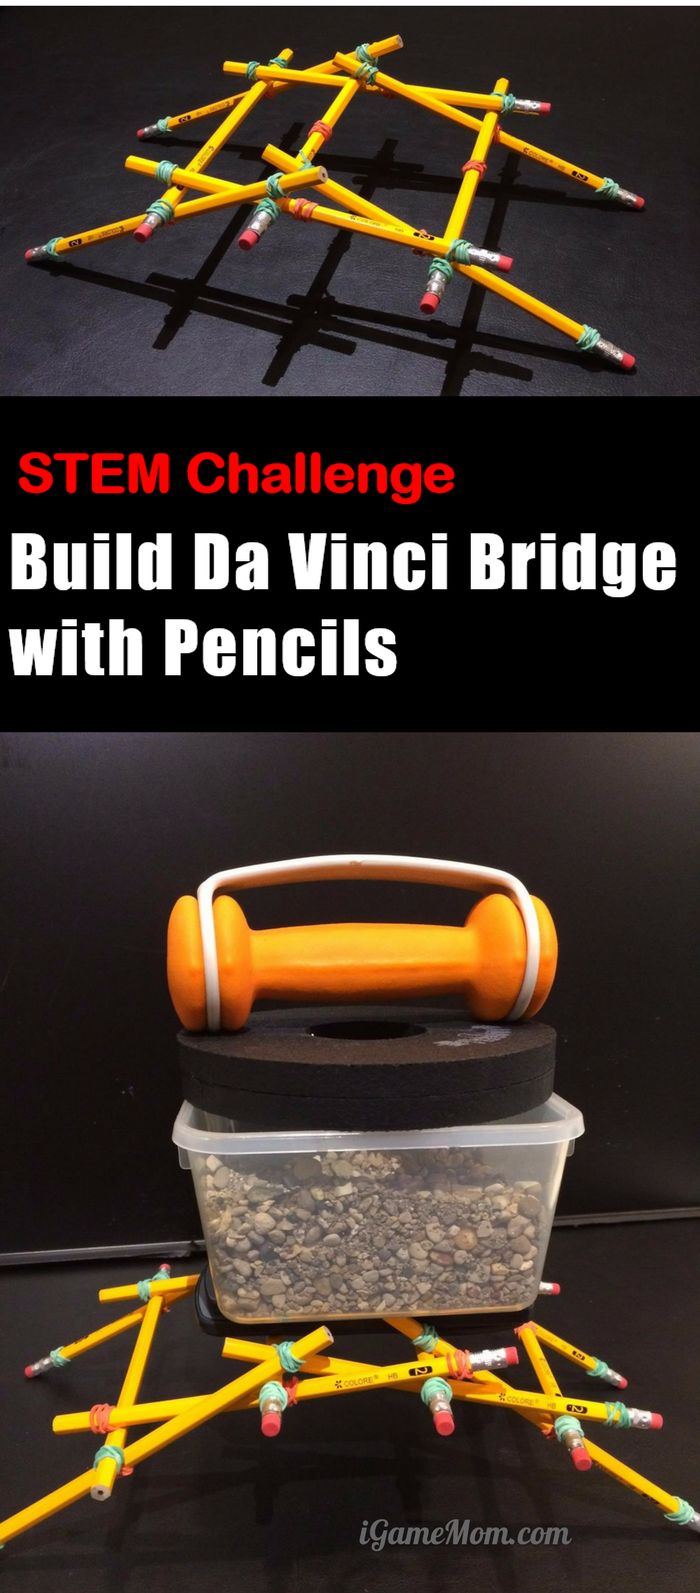
A while ago we visited a Da Vinci exhibit. There was a demo of building Da Vinci bridge with wood logs. We were fascinated by the genius mechanical engineering design and decided to try one ourselves. One thing we have at home is pencil, and that is what we used. Since pencils are common school supplies, I am sure teachers can do it with students as a STEM challenge at school too. Through out the design, plan, build, test, rebuild process, we not only learned engineering design process, but also many physics concepts, such as force, center of gravity. After many fails, we successfully build the bridge. From the picture, can you guess how much weight did our bridge hold? I will share the weight at the end of the post.
Learn How to Build the Da Vinci Bridge — A Step-by-step Instruction
First we watched a demo video on how to build the Da Vinci Bridge.
After the video, we did some quick practice. We then officially started.
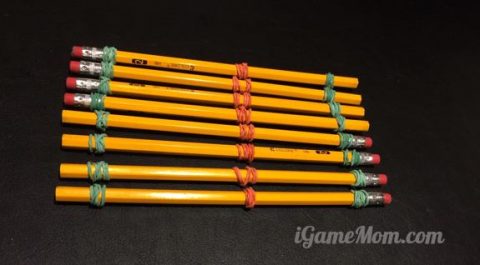
Prepare the Pencils for Building the Da Vinci Bridge
When we first tried using the pencils, it failed.
There is not enough friction between the pencils to hold them in place. We then came up the idea of using rubber bands on the spots that the pencils touch each other. It worked.
We used those robber bands from Loom Bands. Regular rubber bands are too long and too thick for this purpose. The size of loom bands is just perfect.
Some pencils need have 3 locations be rubber band wrapped, some just need two. For the pencils going on the sides of the bridge, they need 3 rubber bands on each pencil, and those going across the sides just need two rubber bands on each.
Build the Da Vinci Bridge with Pencils Wrapped with Rubber Bands
Once we had enough pencils wrapped with rubber bands, we started building the bridge.
To have a bridge, you need a minimum 8 pencils with 3 rubber bands, and 4 pencils with 2 rubber bands. The longer the bridge you want to build, the more pencils you need, and the more challenging to build the bridge and to keep it up. I will talk about the challenges later.
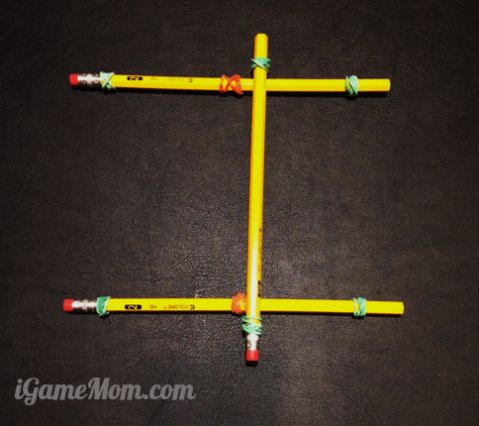
After viewing the video, it is easier to know that it is necessary to mark out the locations where you want to keep the rubber bands on the pencils. For the pencils on the sides of the bridge, you want to make sure the rubber bands are all lined up, ie. are all at the same locations on the pencils.
The rubber bands for the pencils cross the two sides are in fact not on the same locations on all pencils. In our case, their rubber band locations were adjusted during the building process. I will explain more in the tips section.
Bridge Building Challenges and Tips
This is not a one-person job. You need at least 4 hands to work together. The two persons working together need be in sync really well. For this reason, this is a great team building activity.
It is critical to keep the bridge balanced between both sides all the time. To do that, you want to keep the pencils on the sides as straight as possible. When there are times that they need be slightly angled inwards or outwards, you must make sure both sides are angled symmetrically at about the same angles.
The engineering design of the bridge is pretty robust. If it is a little unbalanced between the two sides, the bridge may still stand. However, the mis-alignment effect can add up quickly. You want to keep both sides symmetrically aligned to the best you can, all the time.
We learned to measure the rubber band locations for the cross pencil before we build it into the bridge. The way we measure them was totally a rough estimate. We just put it above where it should stay to get an idea where it was going to cross with the side-pencils, and those were the places to put rubber band to increase the grip between pencils. Doing the adjustment while putting it in is hard. It increases the chance of the side pencils shift locations and the bridge may collapse as a result.
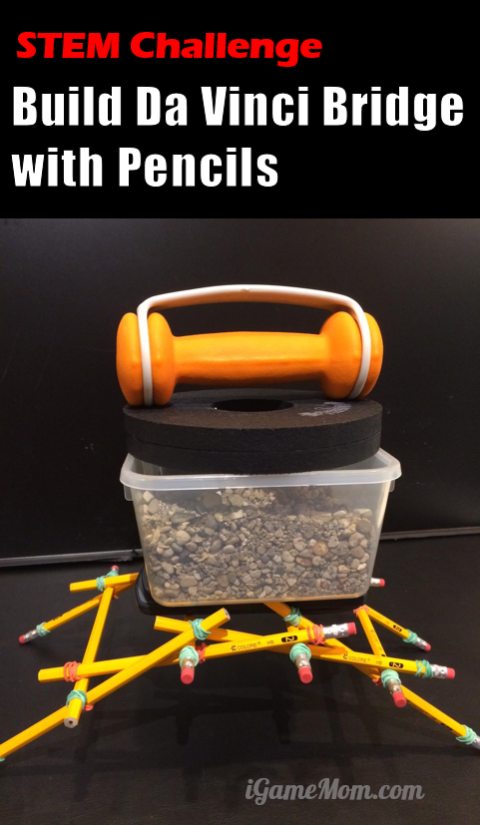
How much Weight does Da Vinci Bridge Holds?
Obviously, we are all curious about how stable and sturdy the bridge is.
We first tried a cup, then put candies in the cup.
After running out of candies, we used a big container with gravels.
Finally, we put on the weight my son used for exercises.
We weighed everything we put on the bridge. It was a total of 3 kg. The bridge was still standing.
Quite impressive!
Additional Da Vinci Bridge STEM Challenge Ideas
Now I want to challenge you to build a Da Vinci Bridge with the materials of your choice. It is a fun STEM project to learn engineering, forces, gravity and friction.
Here are some challenge ideas:
1. Whose Da vinci bridge is longest?
2. Whose Da vinci bridge holds most weight?
3. Who is the fastest at building the pre-defined size Da vinci bridge?
If you build one, don’t forget to post a picture of your bridge on iGameMom Facebook page. I’d love to see it!
Like to have more STEM activity ideas? You will like DIY Coding Camp without Computers, Egg Drop Project Design with Straws, and 7 Free Online STEM Resources.


For more STEM Activities, visit 28 days of STEAM Challenge.


My son is so interested in being an engineer (probably because my husband is an engineer) and this will be a great activity for him! Thanks for sharing!
Mine loved the project. Hope your son does too.
crazy
these look like fun.