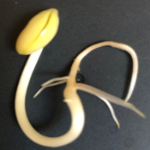
Growing bean sprouts is an easy and fun activity to do with kids. Because it requires daily watering and observation, it teaches kids plant science as well as cultivating good characters, such as responsibilities, patience, and persistence. Additionally, it provides delicious and nutritious food on the dinner table. I highly recommend growing bean sprouts with kids as a family activity. Since you do it indoors at home, you can do it any time of the year.

I have tried mung bean sprout and soybean sprout. Both follow a similar process, with soybean sprouts taking a couple of days longer to grow and carrying a more earthy taste. Relatively, mung bean sprouts are easier to manage. I will give details on how to sprout beans mostly based on growing mung bean sprouts, and add some additional tips if you want to try using soybeans.
Mung Beans and Mung Bean Sprouts
If you have been to Chinese or any Asian restaurants, you probably have seen dishes with bean sprouts. Most of those sprouts are mung bean sprouts. Mung beans belong to the Legume family. They are seeds from mung bean plants, which are annual warm season plants. The fully matured plants are up to 30 inches tall, and it takes 3-4 months to mature. When the plants reach full sizes, they will produce yellowish flowers. Mung beans self-pollinate. After flowers, seed pods will form. They are usually around 3-5 inches long with 10-15 seeds inside. These seeds are the mung beans we use for sprouting.
Mung beans are high in protein. Mung bean soup is a good drink to have in summer. Mung bean sprouts are high in fiber and various nutrients, such as calcium, iron, vitamin B, C, and K. They are also high in antioxidants and peptides, which can slow cancer cell growth as shown in some studies.
Equipment and Materials for Sprouting Beans
There is literarily nothing special is needed for bean sprout. Many people use mason jars. Some use teapots. I made a sprouting jar with a container I had at home. I poked some small holes at the bottom of the container to drain the water and made a cover around the top and the 4 sides of the container to block out light. If you are too busy to make your own, you can purchase sprout jars and sprouting trays to save time.
No matter what you use, you want to make sure:
- There is a way to drain out the water;
- The top is covered to keep the beans stay moisture throughout the time, yet there is good air circulation to prevent the beans from rotting;
- There is a cover to block out the light to encourage the beans to germinate.
Seed Selection for High Bean Germination Rate
To ensure a good germination rate, we need select good seeds first. In principle, you want to select the larger beans of shiny green color. Since mung beans’ germination rate is typically high, I usually only picked out those broken beans before soaking the seeds, as it is hard to set the selection criteria in size and color, especially if you have to explain it to kids. In my experience, smaller seeds still germinated, they might just have thinner sprouts, but taste the same nevertheless.
For soybeans though, seed selection is more necessary, because the germinating rate is much lower. Besides picking out the broken beans, I would pick out those that enlarged quickly after soaking in water. If the soybean becomes much larger than others after 30 minutes in water, it is a sign that there are cracks inside the bean therefore its chance to germinate into a healthy sprout is low.
Prepare the Beans for Sprouting
Before setting the beans for sprouting, you want to soak the mung bean in water for 12 hours. For soybeans, it is shorter, at around 8 hours.
Make sure to use cold water, although, for the first couple of minutes, it can be warm water.
Sprout the Beans
After the beans are soaked, drain the water, and keep the beans in the dark with a piece of dark clothes or box with minimal disruption.
Rinse the beans 2-3 times every 24 hours. Make sure to use cold water and drain the water completely each time.
For mung bean, I usually don’t check them till they are ready to harvest, as usually there is very few that fail to germinate. However, for soybean, I’d go through all the beans on day 2 to pick out those with no sign of sprouting. Keeping non-sprouting beans in the container with high moisture will lead to rotting, making the whole batch smell badly. It takes a day or so for soybean to show signs of sprouting, so if by day 2 there is still no sign of germinating, it is likely it will not happen. If for some reason, the beans are exposed to light, it is not too big a deal. It is just that the beans themselves will turn to dark yellow’ish color, which is not as pretty as the pale yellow if kept in dark. For soybean, the bean will turn green instead of staying yellow. Despite the color change, the taste stays the same.
Harvest Bean Sprouts
It is important to harvest at the right time so the sprouts stay tender. Waiting too long can result in too much fiber in the sprouts therefore taste stringy.
I usually harvest the mung bean sprouts on day 5, when the sprouts are about 1-2 inches long. One time I waited a couple of more days, the sprouts were 3-4 inches long, but the taste was not as tender as those harvested when they were shorter.
For soybean, I waited till day 6 when the sprouts are about 1-2 inches long. Soybean sprouts tend to turn stringy quicker, so it is more crucial to harvest early.
When harvesting the sprout, I cut off the roots as much as I can. You can tell the difference between sprout and root. There are different colors. The roots are light brown while the sprouts are white. Roots also have side roots (secondary roots). Some people keep the roots, as they are nutritious. I prefer taking the roots off for better visual appeal and taste in the mouth. Besides the brown color, the roots are more stringy and less juicy compared to the sprouts.
How to Eat Bean Sprouts
Bean sprouts can be served raw, in salads, or in sandwiches. They can be added to soups as the last garnish for the crunchy taste.
I like the cooked sprout flavor better. There is a more nutty and earthy taste than eating them raw. To cook the sprout, you can either just cook in boiled water for a couple of minutes, or stir and fry for a couple of minutes. The key is not to overcook them, so you don’t lose the juicy feel of sprout.
Engaging Kids Growing Bean Sprouts
All tasks in sprouting the beans are very easy. Children as young as preschool age can do them with adults’ supervision and help. Kids can definitely help make salad or sandwiches when eating them raw. When cooking them, parents and caregivers need to be careful watching the kids.
The Science of Bean Sprouts
While working with kids, we can talk about what the seeds need to sprout. While water, oxygen, and temperature are consistent with our common knowledge of growing plants, contrary to the typical plant growing knowledge, growing sprout needs to avoid light. This is a good opportunity to talk about why plants need light – for photosynthesis. Where does photosynthesis happen? Before the leaves form, the plants can’t use light as the source of energy, so it is relying on the nutrients in the seed for growth, which is better performed in the dark. With these discussions, kids should have a better understanding of photosynthesis – when and where it happens.

Before eating the sprouts, we can show children the structure of the bean sprouts. You can download a free illustration of the parts of the seedling below by filling out your email address. We will send the illustration to your email address.
From the illustration, you can see the white sprout part we eat is called the hypocotyl. It will grow into the bean plant’s stem between leaf and root. Eventually, it will become hard and full of fiber, which won’t be pleasant to eat. This is why we want to harvest the sprout at the right time when it is long enough yet not too stringy to taste.
I had fun growing bean sprouts. It’s been so rewarding when the whole family sitting at the dinner table enjoying the fresh home-grown bean sprouts. Give it a try and let me know how it goes.
For more plant science activities:


